
This is an old revision of the document!
Table of Contents
Login to the Dashboard
 Currently, every user can login to the Dashboard with his own personal login data. It is possible to arrange your own individualized options regarding displayed information. A new Dashboard including new viewing options can be generated by chosing the item Dashboards in the menu.

Adding and creating widgets
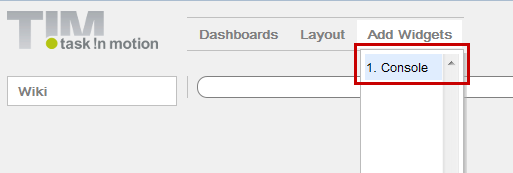 Every Dashboard can have as many widgets as desired. A widget can entail almost any piece of information and has to be defined by an administrator. Adding another widget to the Dashboard is not possible if the logged-in user does not have any necessary administrator rights. But in general, the Dashboard panel can process any piece of available information necessary for analyzing business processes.
Please refer to the following information on which type of chart and which structure can be selected to be used in TIM.
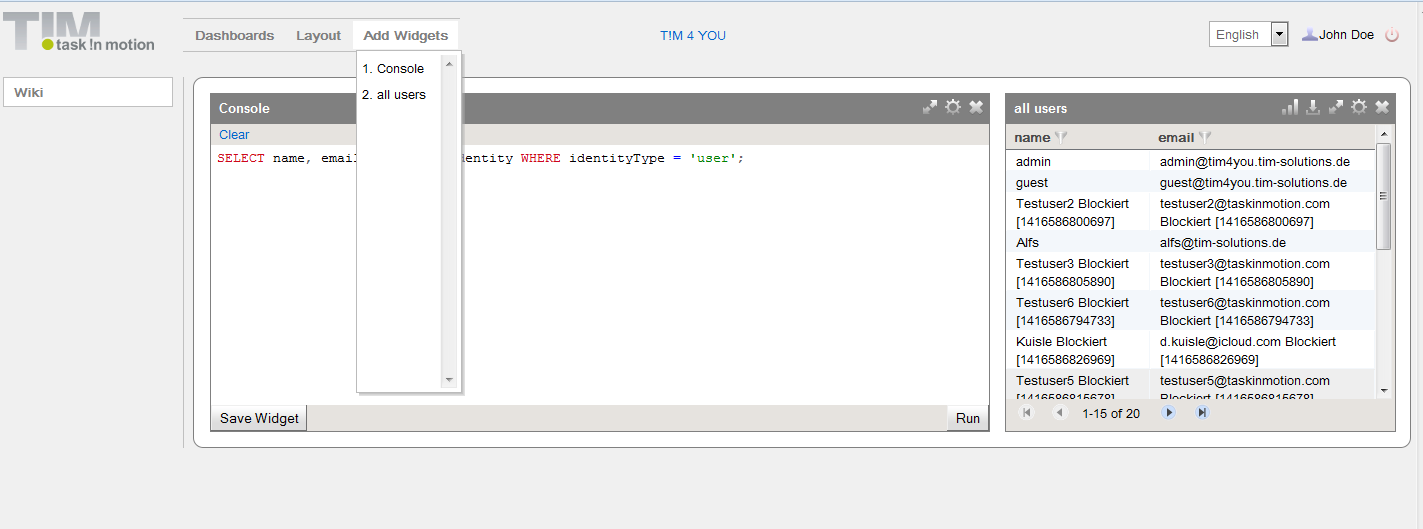
The development of widgets requires knowledge of SQL which also conforms to the standards of MySQL syntax.
- SQL examples
SELECT name, email FROM view_identity WHERE identityType = 'user';
In this example, the widget provides an overview of all existing users of the system. Please refer to this page to access further illustrative examples.
How to save a widget
 A widget providing the desired content can be saved and then eventually made accessible to other users for their own benefit. To save a widget click on the button “Save a Widget”. A name has to be given to the widget which can freely be chosen.
In this example the widget has the name All Users and is selectable via the menu “Add Widgets”.
Layout and Arrangement
The arrangement of the widgets can be organised automatically by selecting any desired layout as shown in the preview. The selection of the layout will always have effects on the design of the current Dashboard. In case that a widget is rendered in a wrong position within the Dashboard it can easily be moved on to another tile. It then acquires the exact size and shape in accordance with the predefined layout.


Widget menu
| Symbol | Function |
|---|---|
| This item on the menu renders the widget in a new graphic design | |
| This item on the menu exports the complete content of the widget to a single file in Excel-format | |
| This item maximizes the widget to the broadest possible width | |
| This item opens the printer dialog of the local computer | |
| This option enables the setting of the diagram type or removal and deletion of a widget from the Dashboard |
Graphical analysis of widgets
In case that the graphical design of a widget is accepted this can be implemented in an easy and flexible way. For this to be correctly implemented a X and Y axis has to be provided in a useful way. In our example, this is not possible to do due to the fact that an axis cannot be created based only on such entities as “name” and “Email”. To make this eentually possible, we have to generate a new widget which is supposed to show how many users had been generated on each weekday.
SELECT DAYNAME(creationtime) AS Tag, COUNT(DAYNAME(creationtime)) AS NUMBER FROM view_identity GROUP BY DAYNAME(creationtime)
This can be saved in the usual manner and then added to the Dashboard. After this step, the X and Y axis can be adjusted via the symbol granting access to the diagram function. Via the configuration of the corresponding widget a desired diagram type can be generated.
TIP!By clicking on the corresponding legend an analysis which has become invalidated due to a crucial value not being in accordance with the norm can be deleted.

Working with variables
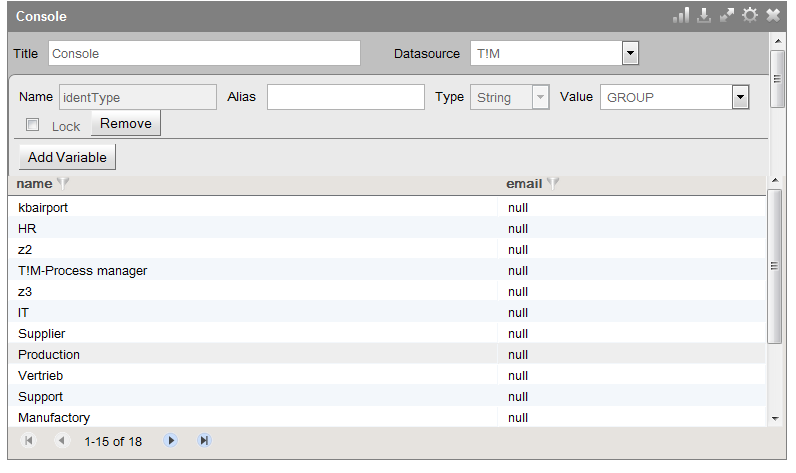
The Dashboard enables access to widgets based on the selection of the value of a particular variable. For example, in the first example not every user should be named by the widget. Rather, this widget is supposed to display entries based on a specified selection of content as predefined by the user. To enable this function the widget has to be changed according to the following way:
SELECT name, email FROM view_identity WHERE identityType = :identType
Note!Within the Dashboard displayed variables will always be identified by “:Variable name”
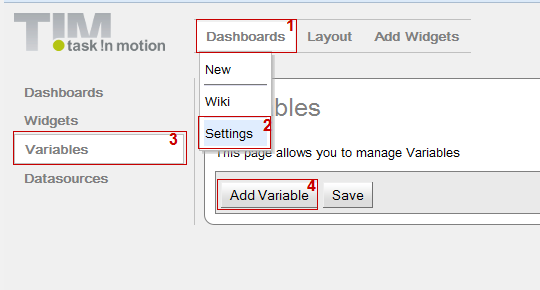
In a second step, the supposed content of the variable has to be defined. To do this the following menu item has to be selected: Dashboards → Settings → Variables
By clicking on the button “Add Variable” an input field shows up to enable the definition of the variable. The following fields are available for this:
- Name - please enter here the name of the variable
- Type - this indicates if the output will consist of letters, numbers or formats representing specific dates
- Providing - this shows if this is a single outcome or a list containing several outcomes
- Query - the content of a variable can be defined within this field by using MySQL syntax
- Executing - this shows the test results of the variable
- Remove - this function will delete the complete variable from the system
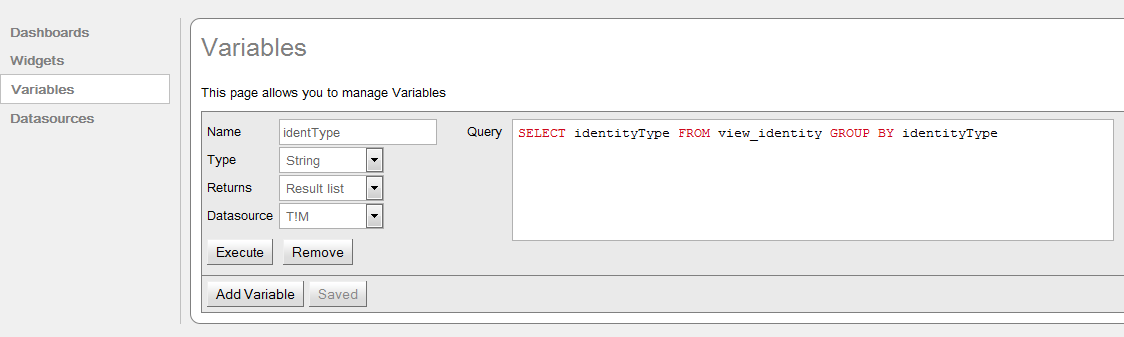
- Variable identType
SELECT identityType FROM view_identity GROUP BY identityType
To test this variable it should be executed and then provide 5 results before saving.
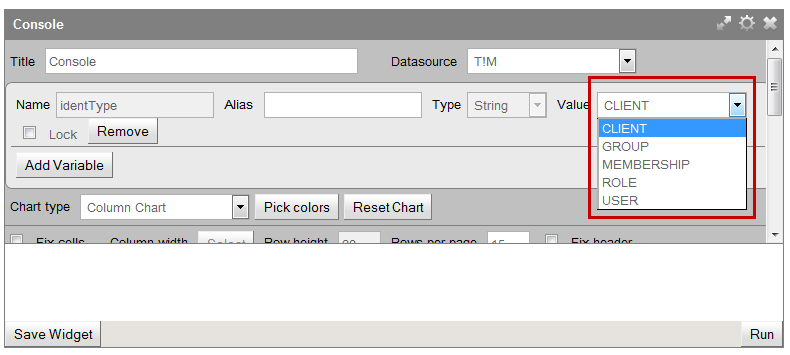 After this the value of the variable can be defined and confirmed within the configuration menu of the widget. The content will be rendered according to the system and the exact settings of the variable. The selection will look as depicted below after the widget has been saved:
Locking variables

The users cannot change this value if this variable has been locked. In the example of the present screenshot the value “User” would always be selected by default. This can only be changed by the owner of the widget. This makes it possible to use a widget for several Dashboards while ensuring that different users have only the authorization to access particular data.
Using global variables
So-called global variables can be used within the Dashboard. The following variables belong to this category:
| Variable | Results |
|---|---|
| :CURRENT_USER_NAME | This names the current logged in user |
| :CURRENT_USER_ID | This provides the UserID of the user |
| :CURRENT_USER_DEPARTMENT | The department to which the user belongs to will be indicated here |
| :CURRENT_CLIENT_NAME | This gives the name of the client |
| :CURRENT_CLIENT_ID | This entry provides the current ClientID |
| :CURRENT_TIMESTAMP | The current timestamp will be shown in this entry |
| :CURRENT_USER_GROUPS_NAMES | This field renders separatly the group membership of the current user in quotation marks (“,”) |
| :CURRENT_USER_GROUPS_NAME1 | This entry mentions the first group to which the logged in user belongs to |
| :CURRENT_USER_GROUPS_NAME2 | This provides information on any second group to which the currently logged in user belongs to as a memeber |
| et cetera… | |
Approving predefined Dashboards
 A Dashboard can be approved for groups of individuals working cooperatively together with TIM if a this has been amended by all sorts of different crucial widgets and settings. Users of this group can then login to this Dashboard and have access to the corresponding Dashboard encompassing these widgets and settings.
Authorized access can then be granted by setting the following item in the menu:
Dashboards → Settings → Dashboards
A Dashboard can be approved for groups of individuals working cooperatively together with TIM if a this has been amended by all sorts of different crucial widgets and settings. Users of this group can then login to this Dashboard and have access to the corresponding Dashboard encompassing these widgets and settings.
Authorized access can then be granted by setting the following item in the menu:
Dashboards → Settings → Dashboards
An opportunity for making an choice is provided in the submenu of the selected Dashboard. By holding the Crtl Key pressed when conducting the selection the desired TIM groups can be jointly assigned the status of approval.
